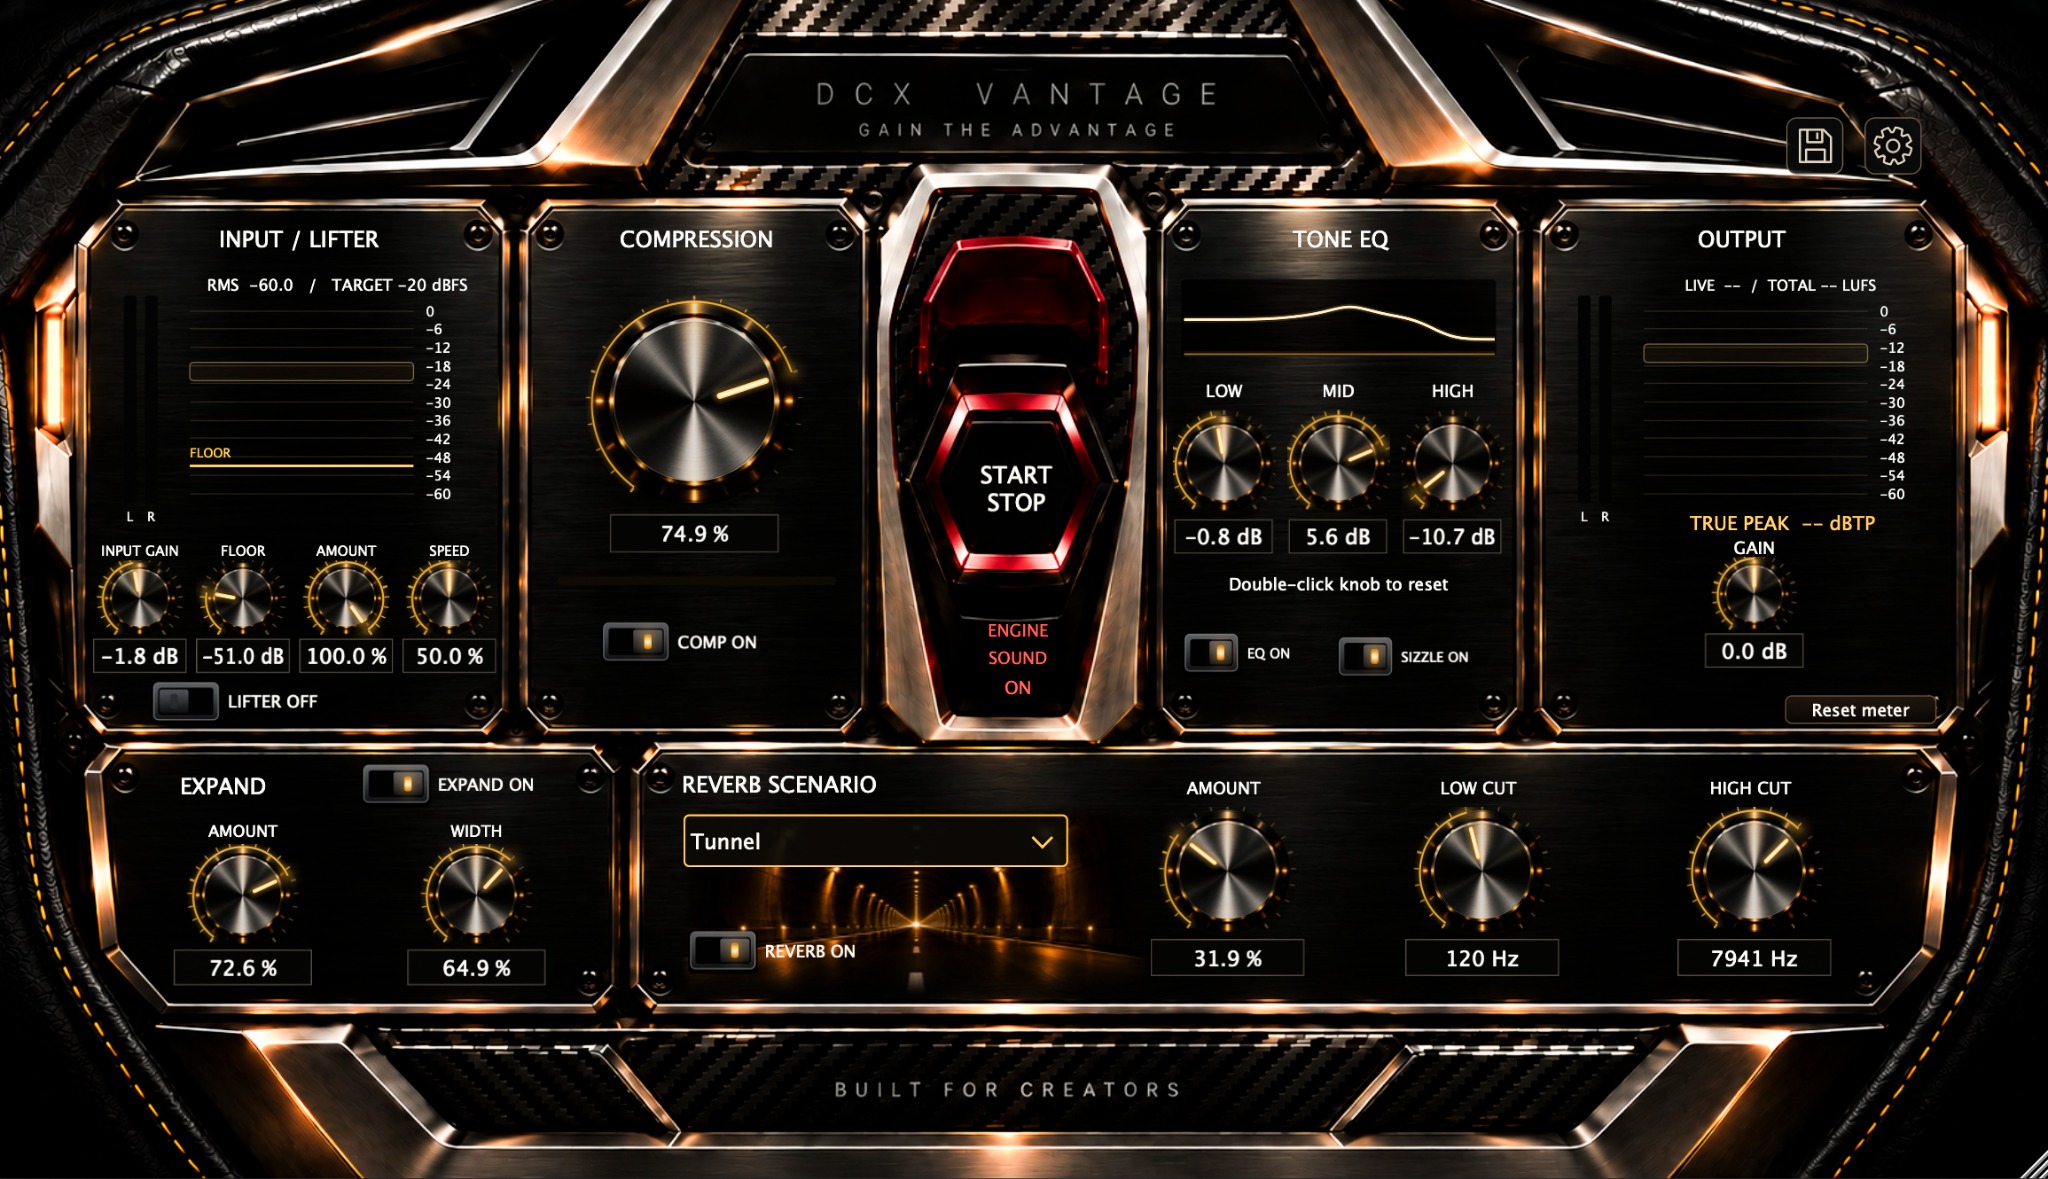
The Main Switch
Start / Stop
The red guarded switch turns VANTAGE processing on or off. Play your recording in your editing software, open the cover, and use the switch to compare your finished sound with the original.
Playback Stays In Your Editor.Start / Stop controls the effects. Your clip keeps playing so you can hear the change in context.
Audio Engineering
This is the master bypass for the whole processing path, including input and output gain. When switched off, the original incoming audio passes through. The lighting and cover animation show the processing state.
Dynamics
Compression
Controls louder bursts so exhaust hits and revs sit more consistently in the edit.
Compression Amount
0–100%Turn it up for tighter control of loud engine hits. Turn it down when you want more of the recording's original level changes. Use Comp On / Off to compare the result.
Audio Engineering
One knob adjusts the strength of a fast, stereo-linked compressor. It combines gain reduction with a retained direct component and restrained makeup gain. The response is designed for sharp automotive transients, with bounded reduction to retain the engine's impact. Amount is the overall processing strength, not a percentage of volume removed.
Tone & Detail
Tone EQ & Sizzle
Adjust the low growl, midrange body and high-frequency detail. The curve above the knobs shows the EQ response.
Low
200 Hz Shelf · ±12 dBAdds or reduces low-end weight. Boost for a fuller growl; cut when rumble or boom overwhelms the engine.
Audio Engineering
A low-shelf filter shapes a broad range of bass frequencies around and below 200 Hz. Positive values boost this region; negative values reduce it. It changes recorded bass rather than generating a new bass layer.
Mid
800 Hz Bell · ±12 dBShapes the engine's body and bark. Boost for more midrange presence; cut to ease a boxy or congested recording.
Audio Engineering
A broad bell filter centred at 800 Hz changes a band of frequencies around that point. Its fixed bandwidth keeps the adjustment focused on tonal balance with a single gain knob.
High
5 kHz Shelf · ±12 dBControls brightness and edge. Boost for more detail; cut to soften sharp exhaust tone or excessive hiss.
Audio Engineering
A high-shelf filter shapes the upper frequencies around and above 5 kHz. The change is broad, so listen to the exhaust and the background together as you adjust it.
Sizzle
On / OffAdds crispness to existing turbo spool, exhaust hiss and fine engine detail. Switch it on when those textures need more presence.
Audio Engineering
Adds filtered upper-frequency content with level-sensitive control, blending it with the direct sound. Its emphasis responds to the recording rather than acting as another static EQ knob. Sizzle has its own switch and remains independent of EQ On / Off.
EQ On / OffBypasses the Low, Mid and High filters together. A value of 0 dB is neutral for each band. Double-click an EQ knob to return it to 0 dB.
Thickness & Width
Expand
Adds a subtle doubled layer and spreads that layer across a stereo recording, giving the engine a broader presence.
Amount
0–100%Sets how much of the doubled layer you hear. Start low, then add it until the sound has the thickness you want.
Audio Engineering
Blends short, gently moving, filtered copies with the direct recording. Increasing Amount raises this additional layer. At 0% the original signal passes without the expansion layer.
Width
0–100%Sets how far the added layer spreads left and right. Lower settings keep it closer to the centre; higher settings make it wider.
Audio Engineering
Adjusts the side component of the doubled layer on stereo channels. Amount must be above 0% for this change to be heard. On a mono track, the added layer can thicken the sound, but Width cannot create a stereo output from that mono channel.
Expand On / OffBypasses the added layer. Check the result in mono as well as stereo, particularly before publishing to devices with a single speaker.
Reflections & Environment
Reverb Scenario
Adds reflections and ambience around the engine. Choose a scenario to suit the location or the atmosphere of your edit.
Parking Garage
Dense, enclosed reflections.
Canyon
Spaced echoes and a distant tail.
Tunnel
Strong, repeated reflections.
Under Bridge
Shorter, covered-space reflections.
Fly By
Restrained exterior ambience.
Interior
Close, damped cabin character.
Amount
0–100%Sets the level of the added reflections. A little creates atmosphere; more makes the environment a stronger part of the sound.
Audio Engineering
Adds the scenario's early reflections and reverb tail while retaining the direct recording. At 0% no reverb is added. At 100% the original engine remains present; this knob is the amount of added ambience, rather than a fully wet mix.
Low Cut
20–1,000 HzReduces bass in the reflections. Raise it when the reverb sounds muddy or the tail adds too much low-end rumble.
Audio Engineering
A high-pass filter on the added reverb attenuates frequencies below the selected cutoff. It shapes the reflections while leaving the direct engine's bass intact.
High Cut
1,500–20,000 HzControls the brightness of the reflections. Lower it for a softer tail; raise it to retain more high-frequency detail.
Audio Engineering
A low-pass filter on the added reverb attenuates frequencies above the cutoff. This changes the tail's tone independently of the direct sound.
Reverb On / OffBypasses the added reflections. Scenarios use algorithmic reverb to suggest different environments. Fly By supplies ambience; the movement and Doppler pitch change come from your recording.
Finished Level
Output & Meters
Set the final volume and check both loudness and peaks before exporting. The meters describe the audio passing through this instance of VANTAGE.
Output Gain
−24 To +24 dBRaises or lowers the finished sound after the effects. Use it to balance the car against your music and keep peaks under control.
Audio Engineering
A final gain stage follows compression, EQ, Sizzle, Expand and reverb. It changes level without changing their settings. Turn it down if processing has raised the overall level too far.
Live LUFS
Loudness MeterShows how loud the current part of the recording is. Watch it as revs rise, fall and pass the camera.
Audio Engineering
Displays momentary loudness over roughly 400 milliseconds using frequency-weighted measurement. LUFS means Loudness Units relative to Full Scale. A less negative reading indicates louder audio.
Total LUFS
Loudness MeterShows the overall loudness of the audio measured so far. Reset the meter, then play the full clip to judge it as a whole.
Audio Engineering
Displays gated, integrated loudness accumulated during playback. It needs more than a single transient to become useful. If VANTAGE is on an engine track, this is that track's result; use your editor's final mix meters to include music and other tracks.
True Peak
dBTP MeterShows the highest measured peak, including estimated peaks between digital samples. Use it to spot level that needs more headroom.
Audio Engineering
dBTP means decibels relative to full scale for true peak. The meter estimates the reconstructed waveform between samples and retains the maximum since reset. It measures peaks; it does not limit them automatically.
Reset MeterClears the accumulated loudness and true-peak measurements so you can measure again. The output highlight around −14 LUFS is a visual reference. Set the final level for your mix and delivery requirements, then check your editor's export settings.
Loudness terminology follows ITU-R BS.1770. The meters help you make an informed adjustment; they do not set an export target for you.
Inside The Installed Plugin
Preset Button
Floppy-Disk IconSave your current sound with a name, or load a setup you have saved before. Useful when several clips need the same starting settings.
Settings
Gear IconOpen the guided tutorial, show your preset folder, or access activation. The menu also shows the plugin version.
Adjusting A KnobDrag a knob to adjust it, or enter a value in its readout. Double-click a knob to return it to its default. Each module's On / Off switch lets you compare that effect while keeping the rest of your settings.
Put It To Work
A Practical Starting Point
Use your own recording as the reference. Start with small changes and compare at a similar listening volume.
- Set The Input.
Play the clip. Adjust Input Gain to leave room for the louder revs. If quieter engine sound needs a lift, set Floor above the background and bring in Lifter Amount.
- Control The Loud Bursts.
Add Compression until the revs sit more consistently. Compare Comp On / Off so you can hear how much of the original impact remains.
- Shape The Engine.
Adjust Low for weight, Mid for body and High for detail. Try Sizzle if you want more turbo or exhaust texture.
- Add The Environment.
Use Expand for thickness and stereo spread. Choose a reverb scenario, then add just enough Amount and refine the reflections with Low Cut and High Cut.
- Check The Finished Level.
Set Output Gain, reset the meter and play the full clip. Compare with Start / Stop, then check the complete mix with your music and the editor's final meters.